Interfacing the Arduino with an SSD1306 driven OLED Display - part 2
This time around we are going to cover how to use the SSD1306 OLED as a buffered display. The OLED has a resolution of 128x64. If we take a bit to store the state of each pixel (1=bright, 0=dark), we’d end up having to stash 8192 bits in the atmega328’s SRAM. A whopping 1KB of ram used up to buffer the display!
128x64 Display Buffer
Define a array to hold the buffer info!
static unsigned char buffer [1024] = {
// 1024 bytes!, stacked in rows of 16
};
First I drew a 128x64 pixel-art to be my splash screen on boot.
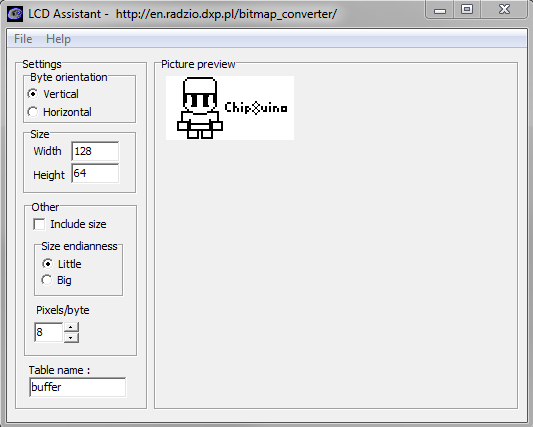
I used this nifty LCD Converter to convert my bitmap image to byte description that I could copy as-is into my source code.
Which will give you something like this: buffer.txt
To actually have it render, we’d need to traverse through the whole buffer array as we transmit them in 16-byte burst transfers. This is small modification of the arduino loop() over what we had in Part-1 of this tutorial.
   for(uint16_t i=0;i<1024;i++){
        Wire.beginTransmission(OLED_I2C_ADDRESS);
        Wire.write(OLED_CONTROL_BYTE_DATA_STREAM);
        for (uint8_t x=0; x<16; x++) {
            Wire.write(buffer[i]);
            i++;
        }
        i--;
        Wire.endTransmission();
    }
FPS: Frames Per Second
To maintain an FPS, we’d only want the screen to be refreshed ever so often, which gives us room to do other things (like figure out all the fun stuff that needs to go on the display). 40ms or 25FPS is a pretty good target for an Arduino Uno to drive. All you’d have to do is control when to initiate the whole display buffer transfer.
unsigned int frame;

void loop() {
    // Collect the current time.
    // This is to ensure maximum frame time will be 40ms
    frame=millis();

    // TRANSFER THE DISPLAY

    // Frame Guard. Ensure that the frame lasted at least 40ms
    while((millis()-frame)<40){};
}
But, to even achieve that framerate, you’d need to boost the I2C clock to run at Fast-Mode (400KHz). This is done by setting the TWBR (Two-Wire Bit Rate) register to “12”. Note that by default, the Arduino I2C clock runs at 100KHz (~100kbps). Transferring 8192 bits at normal rate would only give you 9FPS (I checked) . Hence, I modded the OLED_init() function to rev the I2C clock into Fast-Mode (which will give you ~26FPS).
Read more on the Wire Library and Two Wire Interface registers
void OLED_init() {
    // Init the I2C interface (pins A4 and A5 on the Arduino Uno board) in Master Mode.
    Wire.begin();

    // Set the I2C to FM mode - 400KHz!
    // TWBR = (CPU_CLK / I2C_CLK) -16 /2
    // TWBR = ((16,000,000 / 400,000) - 16) / 2 = 12
    TWBR=12;

    // oled initialization...

    // End the I2C comm with the SSD1306
    Wire.endTransmission();
}


How would you use the SSD1306 with 8x8 sprites instead?
ReplyDeleteI like how you used a bitmap converter to simplify adding your splash screen.
ReplyDelete